Sophos XG Let´s Encrypt Zertifikat inkl. automatischer Erneuerung

Vorwort
In diesem Beitrag findest du eine Step-by-Step Anleitung zur Konfiguration eines Let´s Encrypt Zertifikates für eine Sophos XG Firewall Appliance.
Dieses Zertifikat kann nicht für eine SSLVPN Verbindung genutzt werden.
Voraussetzungen
- Sophos XG Firewall
- Empfohlen siehe: Sophos XG Grundinstallation
- DNS-Nameserver der eigenen Domain via Cloudflare
- VM, LXC Container oder Host zum ausführen eines Cron-Jobs
- Erneuerung und hochladen des Zertifikates via API zur Firewall Appliance
Installation ACME
Im ersten Schritt ist ACME zu installieren um das Zertifikat zu beziehen.
1
2
3
4
apt install git
git clone https://github.com/Neilpang/acme.sh.git
cd ./acme.sh
./acme.sh --install -m my@example.com
1
export CF_Token=APITOKEN CLOUDFLARE
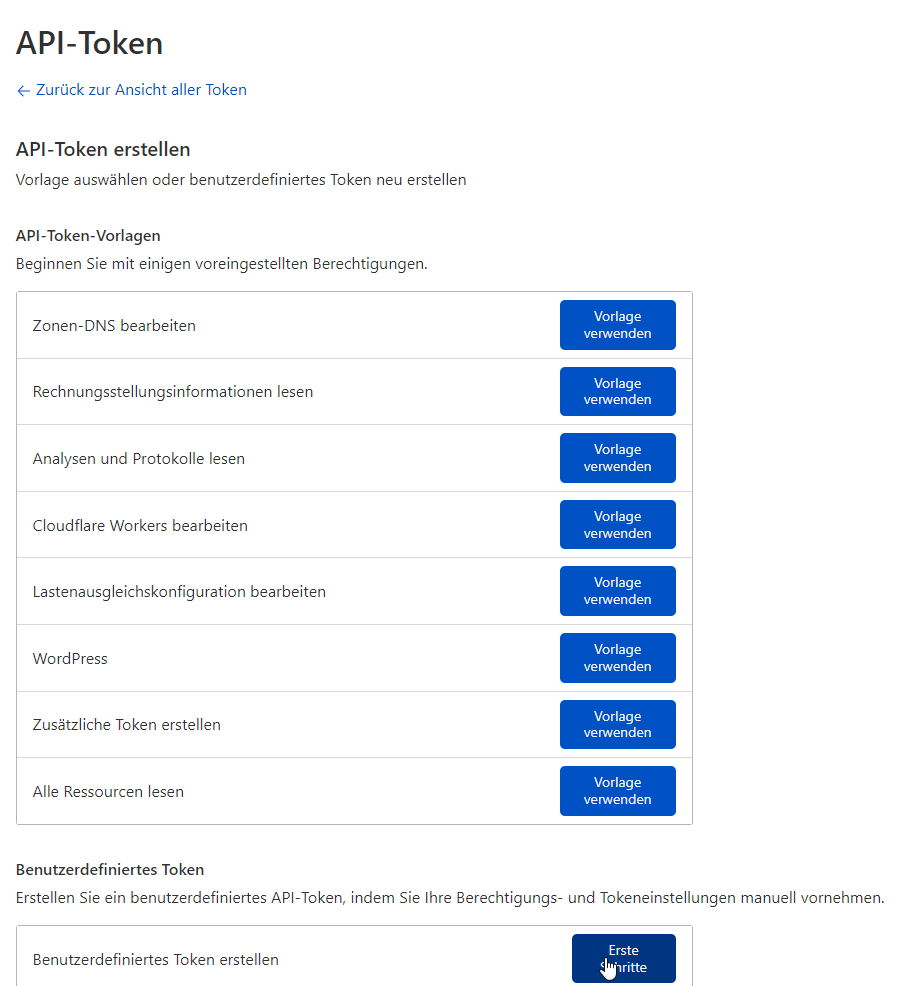
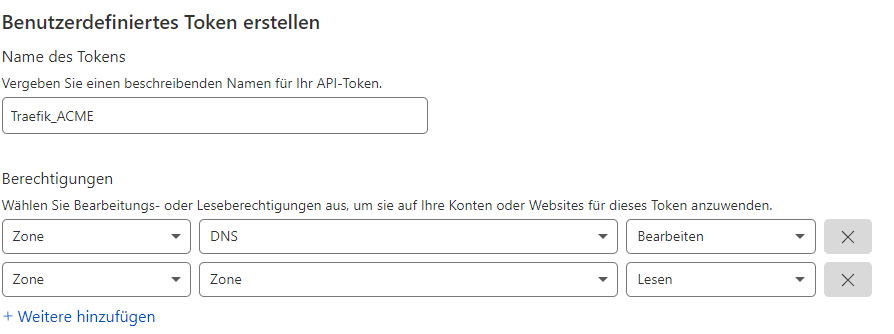
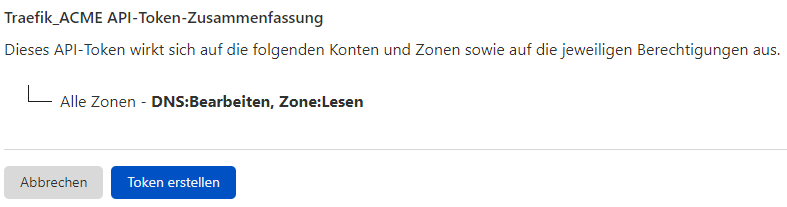
Hier kann ein Cloudflare API Token erstellt werden.
Bezug Wildcard Zertifikat via Let`s Encrypt
1
acme.sh --issue --dns dns_cf --ocsp-must-staple --keylength 4096 -d DOMAIN.de -d '*.DOMAIN.de'
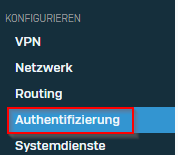
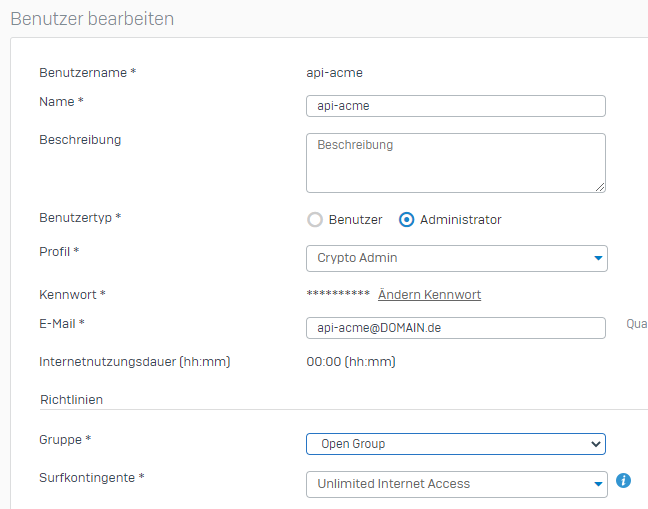
Erstellung API User Sophos XG
Zum Upload eines Zertifikates wird ein Service Benutzer benötigt, welcher wie folgt angelegt werden kann.

Upload des Zertifikates via Skript
In den folgenden Schritten ist das zuvor ertsellte Zertifikat mittels eines Skriptes über die API zur Appliance hochzuladen.
1
2
3
4
mkdir le2xg
cd le2xg
touch le2xg.sh
touch xgxml.txt
1
2
nano le2xg.sh
nano xgxml.txt
1
2
3
4
5
6
7
8
9
10
11
12
13
14
15
16
17
18
19
20
21
22
23
24
25
26
27
28
29
30
31
32
33
34
35
36
37
38
39
40
41
42
43
44
45
46
47
48
49
50
51
52
53
54
55
56
57
58
59
60
61
62
#!/bin/bash
#Copied from https://github.com/mmccarn/sophos and done some enchancements for Wildcard Certs
# router address and port as seen from the system running Letsencrypt
ROUTER=IP-ADRESS:4444
# the system where the LetsEncrypt is running
#
# 1. the 'admin' account has full api access,
# or you can create a dedicated api user
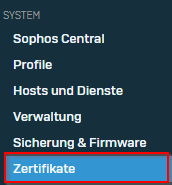
# 2. 'api' access must be enabled at
# Administration -> Backup & Firmware -> API
# - Enable 'API Configuration'
# - enter the IP addresses that should be allowed to access the API
APIUSER=api-acme
APIPLAINPASS=PASSWORD
# Complete path to xgxml.txt
XML=./xgxml.txt
# Letsencrypt domain
# look in /root/.acme.sh/
LEDOMAIN=DOMAIN.de
# Letsencrypt CertificateAuthority
# CA will be created in Sophos as ${LECertAuth}-yyyymmdd
LECertAuth=LetsEncrypt-CA
# cert date
CERTDATE=$(find /root/.acme.sh/${LEDOMAIN}/${LEDOMAIN}.key -printf "%CY%Cm%Cd\n")
# XG Operation
# add: this must be used once to initiate the certificate on the XG
# update: this is used for updating the cert once it has been created
OPERATION=${1:-add}
# Overview -
# 1. copy & rename letsencrypt 'privkey.pem' to 'privkey.key'
# 2. replace placeholder variables in 'xgxml.txt' with values above
# 3. feed the result to curl
# - listing the 3 files to be uploaded in the order they occur in the input
# 4. Delete the copy of privkey.pem that was created
cp /root/.acme.sh/${LEDOMAIN}/${LEDOMAIN}.key ./privkey.key
cp /root/.acme.sh/${LEDOMAIN}/ca.cer ./chain.pem
cp /root/.acme.sh/${LEDOMAIN}/fullchain.cer ./fullchain.pem
sed \
-e "s/APIUSER/$APIUSER/" \
-e "s/APIPLAINPASS/$APIPLAINPASS/" \
-e "s/OPERATION/$OPERATION/" \
-e "s/LEDOMAIN/$LEDOMAIN-$CERTDATE/" \
-e "s/LECertAuth/$LECertAuth-$CERTDATE/" /root/le2xg/xgxml.txt \
| curl -k -F "reqxml=<-" \
-F file=@./chain.pem \
-F file=@./fullchain.pem \
-F file=@./privkey.key \
"https://$ROUTER/webconsole/APIController?"
rm ./privkey.key
rm ./chain.pem
rm ./fullchain.pem
1
2
3
4
5
6
7
8
9
10
11
12
13
14
15
16
17
18
19
20
21
22
23
24
25
26
27
28
29
30
31
<?xml version="1.0" encoding="UTF-8"?>
<Request APIVersion="1702.1">

<!-- Authenticate -->
  <Login>
    <Username>APIUSER</Username>
    <Password passwordform="plain">APIPLAINPASS</Password>
  </Login>

<!-- Upload Letsencrypt Certificate Authority -->
  <Set operation="OPERATION">
    <CertificateAuthority>
      <Name>LECertAuth</Name>
      <Format>pem</Format>
      <CACertFile>chain.pem</CACertFile>
      <CAPrivateKeyFile></CAPrivateKeyFile>
      <Password></Password>
    </CertificateAuthority>
  </Set>

<!-- Upload Cert -->
  <Set operation="OPERATION">
    <Certificate>
      <Action>UploadCertificate</Action>
      <Name>LEDOMAIN</Name>
      <CertificateFormat>pem</CertificateFormat>
      <CertificateFile>fullchain.pem</CertificateFile>
      <PrivateKeyFile>privkey.key</PrivateKeyFile>
    </Certificate>
  </Set>
</Request>
1
sh ./le2xg.sh
Das Zertifikat ist nun auf der Appliance verfügbar.
Automatische Erneuerung und Upload zur Appliance
Zum Schluss wird mit den folgenden Schritten die automatische Erneuerung des Zertifikates und der Upload via Crontab einzurichten.
1
crontab -e
1
2
25 0 * * * "/root/.acme.sh"/acme.sh --cron --home "/root/.acme.sh" > /dev/null
35 0 * * * sh /le2xg/le2xg.sh > /dev/null